
Software Vendors & OEMs
Ready to integrate web DICOM PACS Viewer and connectivity solutions


 Documentation
Minimal Client-Side Requirements
Logging On
Search of Studies
System Menu
Hanging protocols settings
Opening Studies
Patient History
Quick Menu
Viewport Features
Segmentation tools
Measurements
Advanced MPR Features Oblique MIST
Customization Features
Add-ons: Optional
Documentation
Minimal Client-Side Requirements
Logging On
Search of Studies
System Menu
Hanging protocols settings
Opening Studies
Patient History
Quick Menu
Viewport Features
Segmentation tools
Measurements
Advanced MPR Features Oblique MIST
Customization Features
Add-ons: Optional
The main supporting functions of the DICOM Viewer are as follows:

System menu > Shortcuts > Keyboard Shortcuts tab. The keyboard shortcuts allow the users to quickly change tools and interact with the data.

Shortcuts menu will display window with keyboard shortcuts:

Possibility to assign custom shortcuts per user. The user can configure the shortcuts: remove the shortcut, that is assigned to the command, by pressing “x” next the shortcut. Assign the shortcut to the command: press the shortcut editing notification icon and then press the Keyboard Shortcuts button. Create keyboard shortcut window is opened to insert keyboard or mouse keys, which will be assigned as shortcut to the command:

System menu > Shortcuts > Mouse Shortcuts tab. Ability to set different mouse shortcuts for different modalities:

One-time mouse action allows setting a default left mouse action (configurable):

 Orientation labels
Viewport > Orientation Labels on the edges of the images clearly indicate how the patient is oriented.

 Info Labels
Toolbar > Info Labels. Possibility to show/hide Info Labels in viewports for image, multi-frame or video:

By default when the Viewer window is opened the info labels are displayed and the Info Labels button is highlighted.
Watch video tutorial demonstrating how to show/hide Info Labels in viewports of MedDream WEB DICOM Viewer:
Thumbnails Bar and Viewport > Info Labels > Comparison Study. The comparison study’s date can be highlighted. Numbers are shown in front of the date to indicate the opened studies in Thumbnail bar and Viewport (configurable).

The additional label and date highlighting for comparison studies may be configured in system settings:

Viewport > Lossy compression. Displaying the compression type and ratio for lossy compression images in viewports:

Toolbar > Plugin > Image Filtering. Smooth, Sharpening and Edge filters options.
Configurable via Plugin functionality:

Selecting the filtering options:

Original image and the image after filtering:

 Plugins
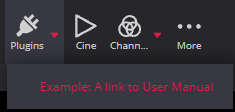
Toolbar > Plugin. Plugins hold links to external systems and services, needs to be configured by system administrator.
Quick image opening (Right-click). Click the right mouse button on the image thumbnail to open the image in an empty or new viewport.

 Report
Report. Possibility to write a report for a study. Report function can be reached in the viewport or in the search window:

Report status (filled or empty) is shown with different icons:

You can perform the following in the Report window:


NOTE: the Report module is an additional module and should be granted by license. The Report icon is visible only if the Report module is allowed by license, system configuration, and the user has right to view or edit reports.
 Image Print
Toolbar > Print. Possibility to print an active image from the DICOM Viewer.

Choose one of Printing options: Print Active Layout Area or Print Non-Empty Layout Areas.
DICOM Print possibility with integrated printing component.
 Forward
Toolbar > Forward. Forward studies, selected series, image intervals, or individual images to the other DICOM devices:

Forward selected series:

Forward selected image intervals and separate images:

 Export
Toolbar > Export. Export multiple studies and save them in different formats: DICOM, jpg/mp4, tiff/mp4, png/mp4, and bmp/mp4. Including Web Content (JPG) option with DICOM data (configurable).

Possibility to export multiple studies by clicking on check box to include/exclude the study from the list. Active study is checked for exporting automatically. Two ways of exporting big files:


Also there is a possibility to burn ZIP to CD or USB with created Reports in PDF. Choose: Report > Included as PDF for study or studies to be exported to CD or USB zips with created Reports for studies:

After starting export process there is a possibility to close the export window and download the created archive later by pressing on Recently Exported link:

Recently Exported link opens the Recent Export Jobs window with the list of created archives for downloading:

Watch video tutorial demonstrating the exporting functionality of MedDream WEB DICOM Viewer:
Toolbar > Export. Export the study to burn it into CD/DVD/Dual-Layer DVD/Custom Size.

1. Select the file saving format in the Format field.
2. Select the export scope in the Scope field.
3. Select output archive type in Media field.
4. Select archive size in Size field.
5. Select either you need to include the study’s Report in archive.
6. Click the Start button.
7. Choose Burn or Download button.
 Anonymize and Share files
Toolbar > Share files via DICOM Library. Anonymize and share studies via DICOM Library. Possibility to send an email in selected language: EN or DE:

Watch video tutorial demonstrating the sharing files functionality of MedDream WEB DICOM Viewer:
 DICOM Upload
Toolbar > DICOM Upload. Possibility to upload individual DICOM files as well as DICOM series to configured PACS. Uploading can be done from files, directories, or ZIP archives by web upload plugin.
Upload DICOMs to configured PACS (role is needed):

 Study Update from PACS
Thumbnails Bar > Study Update from PACS. Study changes tracking in PACS. Configurable. PACS support required. Supported PACS: MedDream PACS, PacsOne, Query/Retrieve, dcm4chee v2, and dcm4chee v5, Orthanc.
Track study changes in PACS:


© 2026 MedDream UAB. All rights reserved.


 Software vendors
 Hardware vendors
 System Integrators
 AI & CAD vendors
 Education & Research
 AWS HealthImaging
 Azure Health Data Services
 Google Cloud Healthcare API
 Radiology
 Cardiology & Ultrasound
 Ophthalmology
 Orthopedics
 Dentistry
 Surgery
 Mammography
 Pathology
 Veterinary


